< Back to Guides

Simple Client Dashboard Pro Setup

Table of Contents

Introduction

Hello there! Glad to have you as a part of the Simple Client Dashboard community 🥳 Getting started is super simple and can be summarized in three steps:

  1. Install and activate the Simple Client Dashboard plugin
  2. Assign the new Admin user role to your client’s WordPress account.
  3. Customize the permissions set in the Simple Client Dashboard settings (Premium plugin only!)

Video Walkthrough


1. Install and Activate the Simple Client Dashboard Plugin

First thing, you’ll need to upload the zip file for the Simple Client Dashboard plugin to your WordPress website.

Download Premium Simple Client Dashboard Plugin

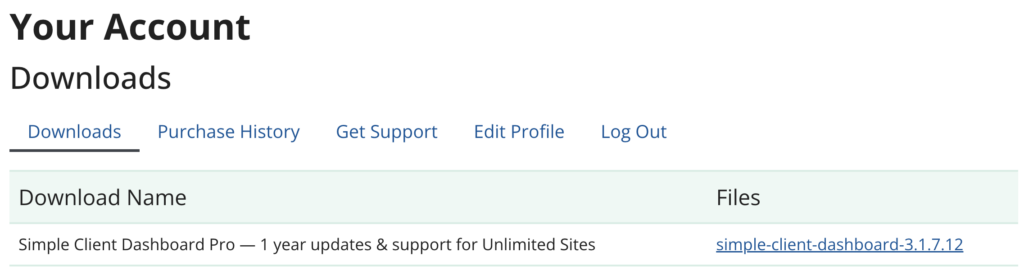
Download the zip file for the premium plugin from your account or the purchase confirmation email.

After your purchase, you’ll get a link to download the zip file via email. You can also click the link to download it at the bottom of the Purchase Confirmation screen.

If you can’t find the email with the zip file included, please feel free to log in to your Simple Client Dashboard account here on the site. You’ll be able to download the zip file under the Downloads tab.

Screenshot of the Simple Client Dashboard account’ Downloads tab.

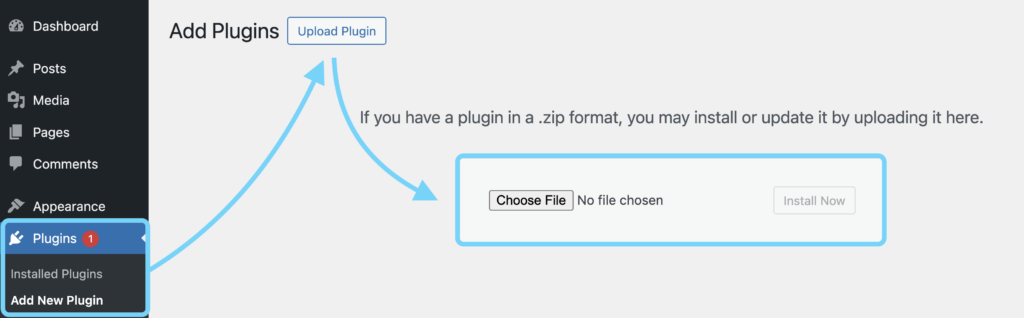
Install and Activate the Plugin on Your WordPress Site

In your WordPress admin dashboard, go to Plugins > Add New, then choose Upload Plugin (toward the top left) and upload the zip file.


2. Assign The New Admin User Role

Next, you’ll need to head over to the WordPress Users tab and edit the account for your client.

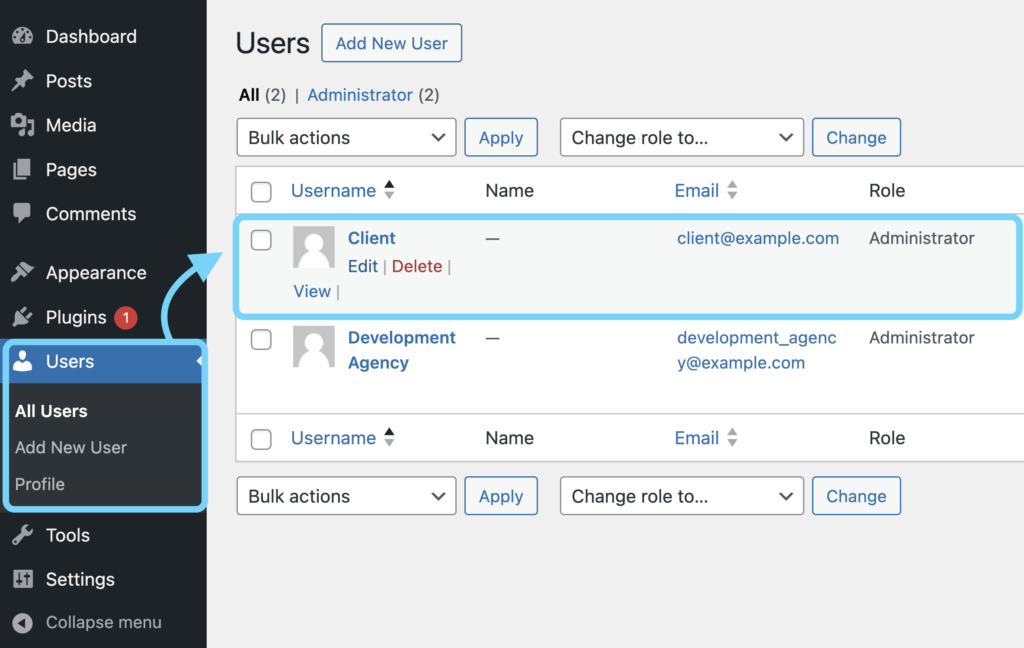
Under the Roles section, select the new Admin user role option. If previously assigned as the Administrator or Editor, go ahead and remove those roles.

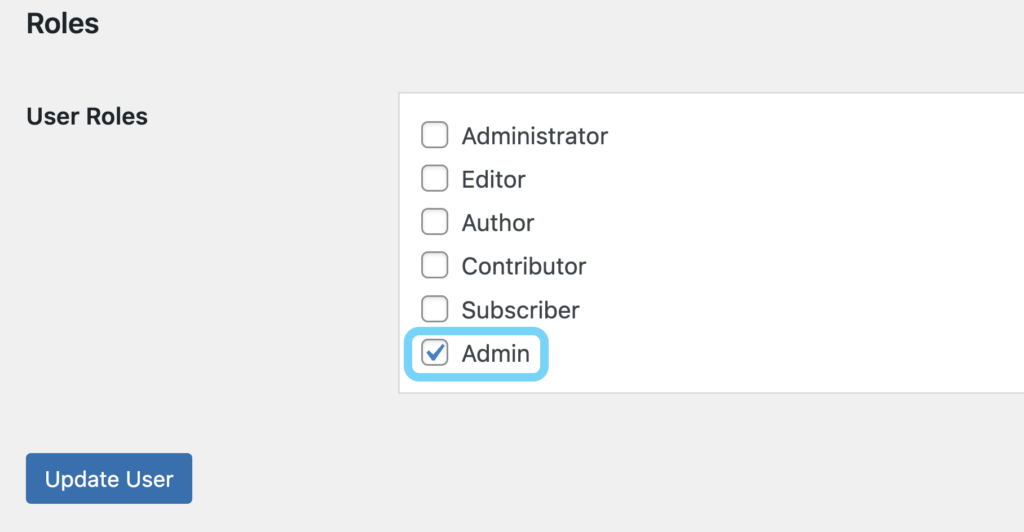
When you’re done, click Update User. This will automatically give your client the default Admin user role permissions in one click!

Comprehensive List of Default Admin Permissions

WordPress Dashboard Restrictions

Restrict access to only the features and functions they need to manage their site – without breaking it!

Restrict ability to install, update, switch, edit or delete themes but allow the user to edit theme options such as widgets, menus, and the Customizer.

Hide or Remove the WordPress Plugins menu. Restrict ability to install, activate, update, edit and delete plugins.

Hide or Remove the WordPress Settings menu.

Hide or Remove the WordPress Tools menu.

Restrict permissions to list, create, edit, and delete WordPress Users.

Disable WordPress Core Updates.

Hide ACF menu and settings, including definitions, rules, and fields.

Restrict ability to create Custom Post Types.

Restrict the ability to create new forms, delete forms, and edit forms but allow the user to view submissions.

Restrict ability to add Draw Attention images.

Allow users to manage products, manage customer payments, manage reports & sales data, and/or manage settings.

Hide business profile settings.

Restrict the ability to create new forms, delete forms, and preview forms but allow the user to edit forms and view submissions.

Hide the Jetpack stats.

Restrict permissions to edit courses, assignments, groups and the group leader.

Restrict the ability to import and export forms, manage settings or extensions, and view the system status but allow the user to edit forms and view submissions.

Remove permission to manage URL redirection settings.

Hide option to add CSS.

Hide the Optimizer settings menu.

Restrict access to the Slider Revolution menu.

Hide SolidWP menus and settings.

Hide security scan information.

Hide the TablePress Options screen but allow the user to show, edit, import and export TablePress content.

Restrict the user’s ability to manage and delete events, venues, and organizers.

Hide the settings but allow the user to edit & view products, coupons, or orders, allow the user to view reports.

Hide the Wordfence Dashboard Widget

Remove ability to use WP All Import Settings Menu.

Hide Yoast SEO settings menu and hide the SEO meta box when editing pages/posts.

Third-Party Plugin Limitations

Restrict their capabilities and permissions just enough to make sure no unexpected problems arise as they begin working on their website.

Don’t see the plugin you’re looking for? Send us a message!

If you want to customize the permissions a bit further, you can go to the next step.


3. Customize Admin Permissions (Premium Plugin Only)

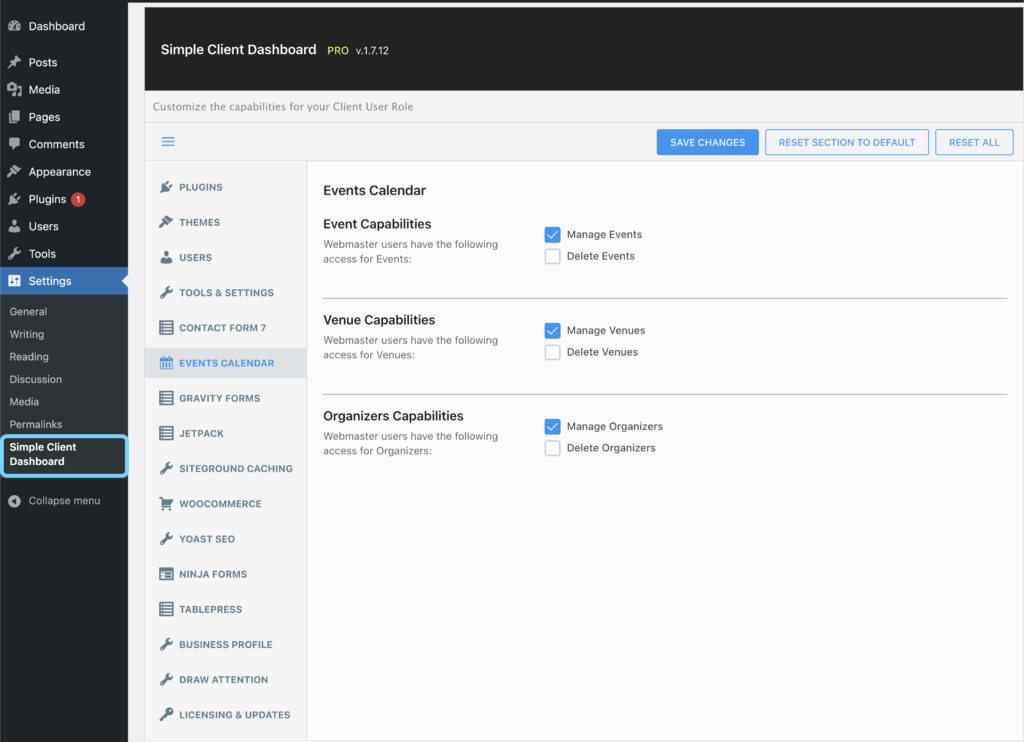
Using the Simple Client Dashboard interface, you can take the customization of the Admin role even further. Go to Settings > Simple Client Dashboard tab to access the Admin permission settings.

Go through the available tabs within the interface and review all the permissions associated with the different areas of your WordPress website. Like the Plugin settings, Themes, Users, and the variety of individual plugins (ex. Gravity Forms).

The permission customization interface is only available for the premium versions of Simple Client Dashboard.

Share This Post